image to vector maximum definition | Adobe illustrator CC 2017

image to vector maximum definition | Adobe illustrator CC 2017

image to vector maximum definition Adobe illustrator CC 2017

Discover how to obtain the maximum definition possible when converting an image into vector in Adobe illustrator CC 2017 , get the best out of image tracing option.

the technique described in this tutorial consists of increasing the number of pixels per inch that composing the digital image before converting it into vector shapes using the tracing options in Adobe illustrator.

means that we can use this technique to increase the number of pixels composing an image before it gets calculated and converted into shapes in illustrator so when the photo gets vectorized it doesn’t look different from original but contrary it will look natural and completely similar to its native quality.

so we can assume that the more colors and pixels an image contains the more shapes gets created during the image tracing process.

For Example : what you see here is a comparison between two images converted into vector in Adobe illustrator, the picture on the left was directly traced without using the technique we are talking about , and the picture on the right is the same photo but was increased to a higher number of pixels per inch before image tracing.

image tracing result before increasing the number of pixels per unit
after increasing the number of pixels per unit
image tracing result after increasing the number of pixels per unit

before we proceed to the tutorial the only problem to keep in mind is that this method needs good machine resources so you may encounter slow processing durations if your computer machine performances are not good enough to support the conversion method we are describing but anyway you will figure out that the result is 100% better than how you were usually doing image tracing or image to vector conversions in Adobe illustrator.

1- first open your photo in Photoshop and go to Image menu then choose Image Size.

2- in Image size window make sure the Resample box is checked and “Preserve Details ( Enlargement )” is selected and Reduce Noise is set to zero.

then you should multiply the number of pixels per/inch which is the Resolution of an image , in my case my image was 72 pixels per / inch so i’ve multiplied 72 X 10 = 720 and as a result the width and hight in pixels also got multiplied by 10 which means that the photo now is 10 times bigger.

Note :

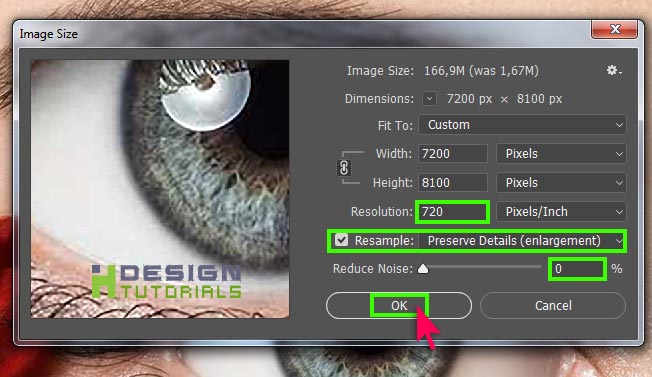
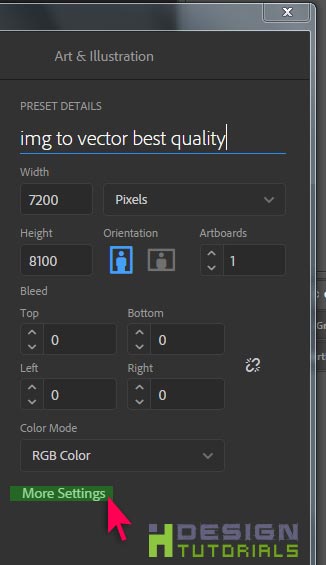
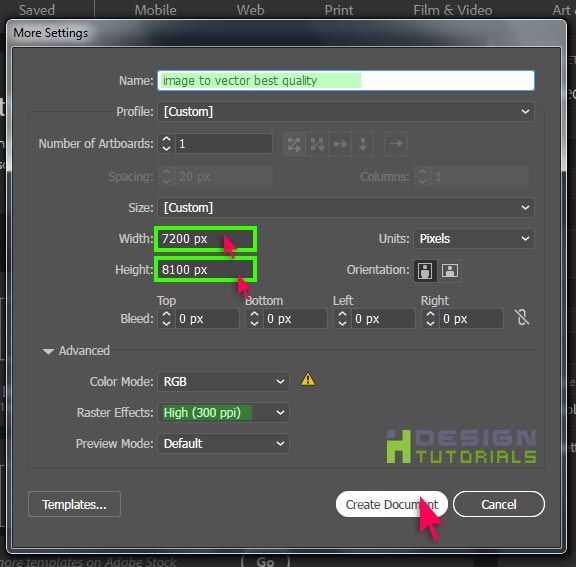
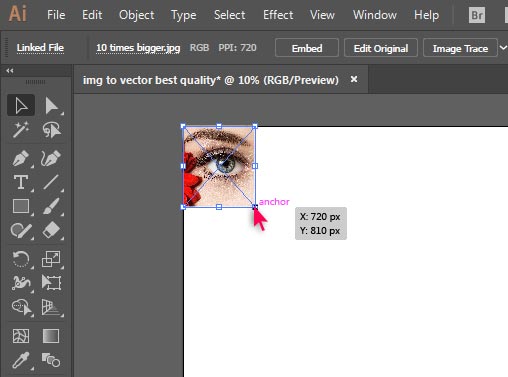
when increasing the Resolution of your image as an advice don’t exceed 10,000 pixels in both width and height to prevent any computer performance slow down.

means that if your photo is already big “yes” you can still enlarge it but not if its already up to 10,000 pixels in width or height.

3- after done enlarging the photo go to File menu and click on Save As…

4- in the Save As.. window change the Save as type to : JPEG (*.JPG;*.JPEG;*.JPE) , then click on Save.

5- in the JPEG window that appears set the image quality to Maximum and set the Format to Baseline (“Standard”) then click on Ok button to export your JPEG image file.

6- in Adobe illustrator cc 2017, in the New Document window click on More Settings.

7- set both the width & height of the document to the same width and height of your enlarged JPEG photo , also you can change the Color Mode to “CMYK” if you want to create a document for print and set Raster Effects to : High ( 300 ppi ) to get the maximum quality when applying effects in illustrator.

8- after creating a new document in illustrator go to File Menu then select Place.. from the list.

9- select your JPEG file then click on Place.

10- place the photo in the top left corner of the canvas then hold Shift key on the keyboard and use the mouse to drag the bottom right anchor of the photo to fit it inside the canvas.

11- after that go to Window menu and click Image Trace to show up the Image trace panel inside the workspace.

12- in the image trace panel first change the Preset to : High Fidelity Photo then if any warning appears just click on OK and stop the Automatic tracing process ! then uncheck the Preview box in the bottom.

  • set Colors to 100
  • set Paths to 100%
  • set Corners to 100%
  • set Noise to 1px

then click on Trace button.

13- Finally click the “Expand” button to complete the image tracing process.

Also watch the following video tutorial to see the entire process and take a look on the live comparison between image tracing results with and without the technique we’ve just described.

i hope this guide was helpful for you thank you for taking your time reading and watching the tutorial , if you have any questions or thoughts regarding the technique described in this article please Contact us or leave a comment below we will be glade hearing from you.

Also please make sure you follow our page on facebook and subscribe to our youtube channel to get informed each time we post new articles and tutorials.

Leave a Reply

Your email address will not be published.