fastly learn how to give your selfies a stylish look in Adobe Photoshop, make your mobile phone photos look stylish by adding a nice depth of field in the background.
most mobile phone camera lenses does not support or not coming with a good built in depth of field functionality , in this Adobe Photoshop tutorial i will show you how to create a nice and realistic depth of field in your mobile phone pictures background.
so if you don’t care about what’s in the background of your photo or, want to hide something behind you, or just want to stylize the look of one of your phone images this tutorial is for you.
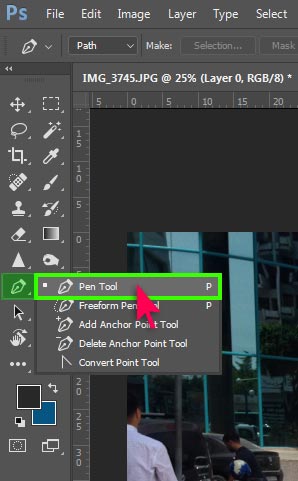
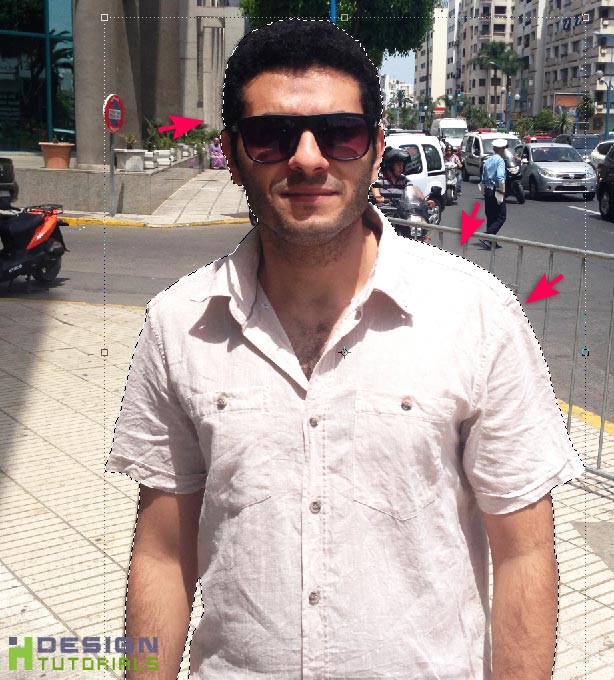
1- first open your photo in Adobe Photoshop and activate the layer by double clicking on it in the layers panel on the right side of the workspace, then select the Pen Tool from the tools bar.
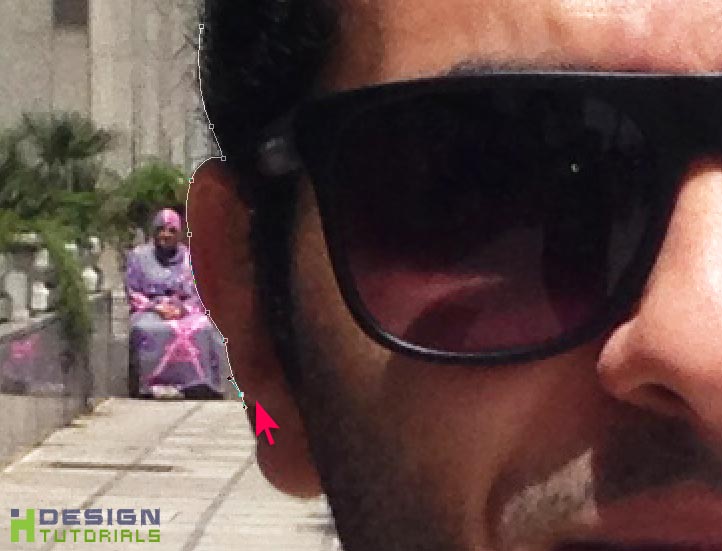
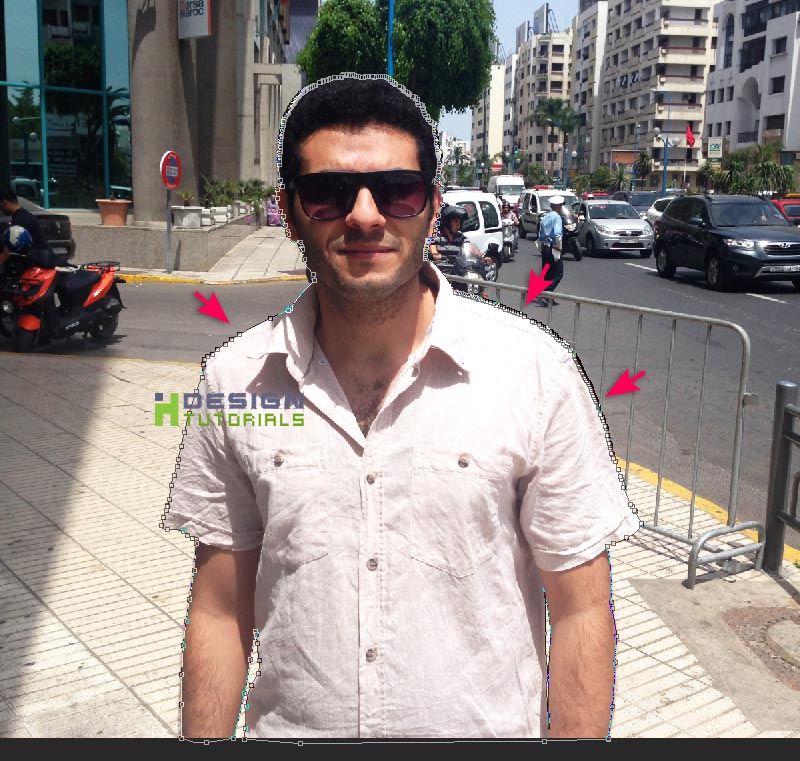
2- use the Pen tool to start adding anchor points around the edges of the subject until you fully create a closed path.
( Done creating the path around the subject )
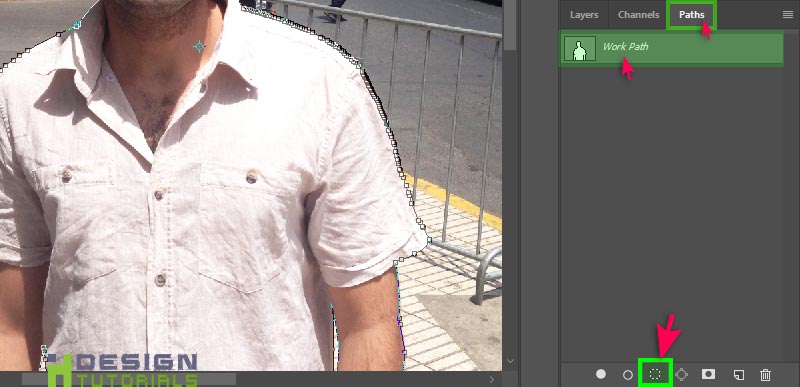
3- on the right side of the workspace, switch to Paths panel and make sure the Work Path layer is selected then Click the icon in the bottom of the panel to convert the path into selection.
( Done converting the path into selection )
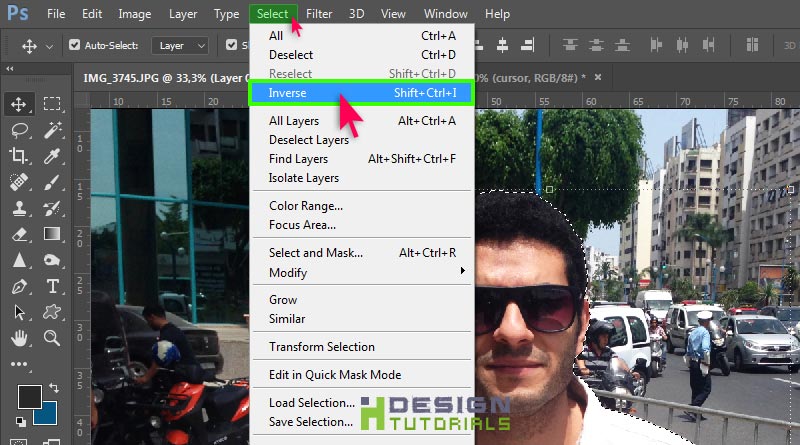
4- go to Select menu then click on Inverse from the list , this will select the background instead of the subject.
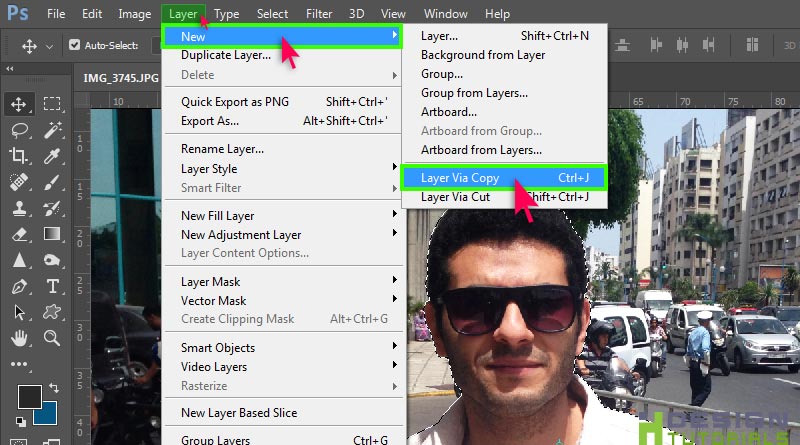
5- go to Layer menu — New — then chose Layer Via Copy or tap “Ctrl+J” on the keyboard , this will create a new layer for the selected background.
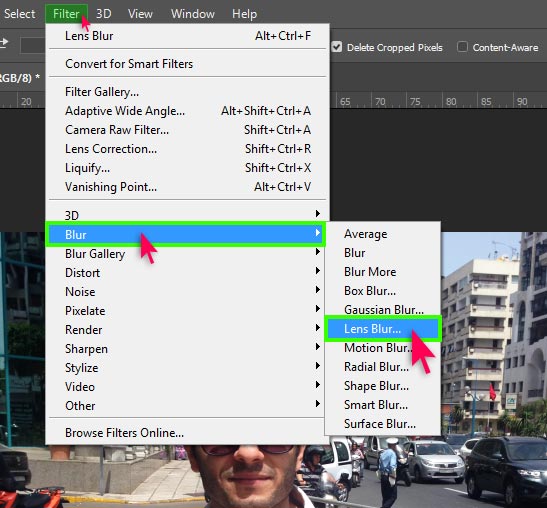
6- go to Filter Menu — Blur — and choose Lens Blur…
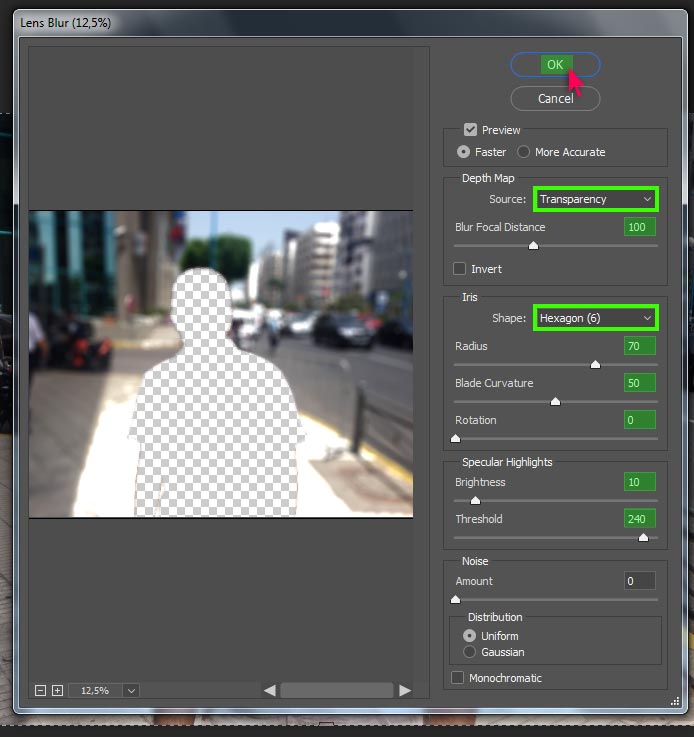
7- in the Lens Blur window do the following parameters :
in Depth Map
set Source to : Transparency
set Blur Focal Distance to : 100
in Iris
set Shape to : Hexagon
set Radius to : 70
set Blade Curvature to : 50
set Rotation to : 0
in Specular Highlights
set Brightness to : 10
set Threshold to : 240
then click on Ok button to apply the Blur Effect.
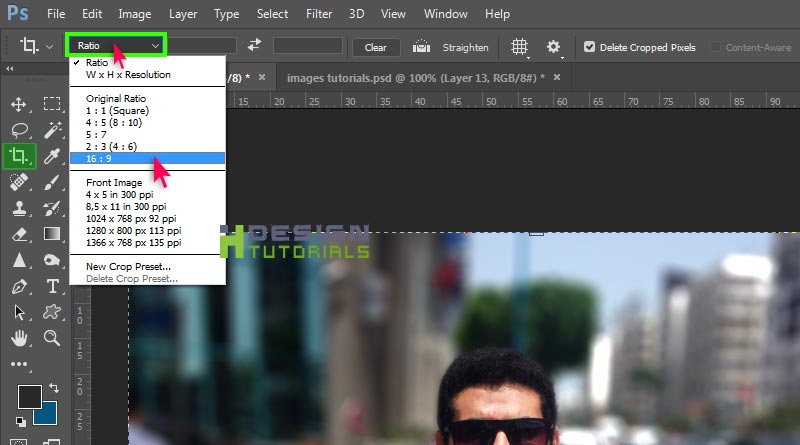
8- you can also Go to the tools Bar and select the Crop tool to correct the framing of your photo.
9- while the Crop tool is selected you can choose another framing composition , i will select the 16:9 to give my Photo a nice 16:9 HD framing.
10- now tap Enter key on the keyboard to apply the cropping.
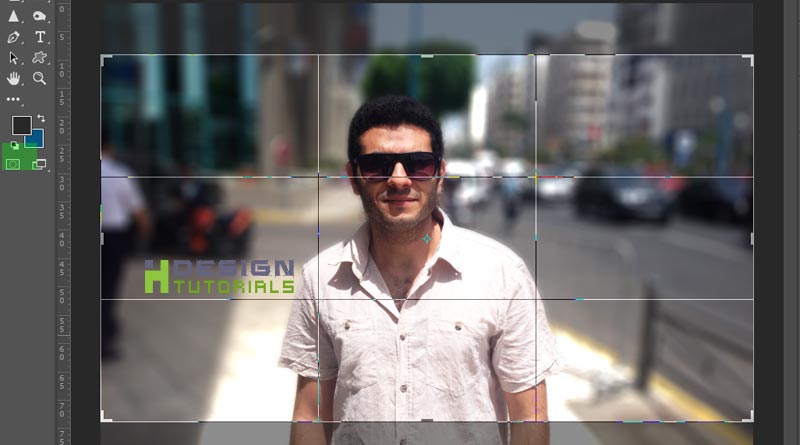
( Done creating the Depth Of Field )
Also watch the full video tutorial to see the entire process and get a better explanation.
i hope this guide was helpful for you, Thank you for taking your time reading and watching the tutorial , if you have any questions or thoughts regarding the Tutorial please Contact us or leave us a comment below, we will be glade hearing from you.
please make sure you follow our page on facebook and subscribe to our youtube channel to get informed each time we post new articles and tutorials.