Mixing voiceover & music using Sidechain Compression in Adobe Premiere Pro
Mixing voiceover & music using Sidechain Compression in Adobe Premiere Pro
In this guide we will highlight an advanced audio technique for video editors and explaining in details How to mix voiceover and background music using Sidechaine Compression VST plugin in Adobe Premiere pro with the help of Adobe Audition and how Sidechaine Compression can help us controlling & automating the volume level of background music without the need to manually cutting the music audio track into pieces to reduce the volume whenever the voiceover is present or using manual key framing which can be time consuming and hard to achieve especially when dealing with long duration projects.
Using Sidechain Compression with voiceovers and music is not only effective in ensuring that the voice remains clear and prominent in the mix without competing with the background music, but also a dynamic equalizer VST plugin like Trackspacer will allow us to choose what frequency to reduce from the music, and with compression parameters like: ( Attack and Release ) Sidechain Compression will also allow us to set the duration of the ducking effect or the amount of time the music volume is lowered against the voiceover.
Unlike the auto Ducking feature available in Premiere Pro Essential Sound panel that allows for automatic computation of key frames that lower the volume of a background sound against a foreground sound. using a third party VST plugin like Waves Factory Trackspacer for Sidechaining voiceover and music remains a more professional and easier way to achieve ducking without generating any key frames inside the project in Premiere Pro, while putting in mind that in some situations generating keyframes on the audio track to lower the volume of music can be destructive and annoying especially when trying to re adjusting the position or the duration of both audio tracks, while re applying the Ducking effect available in Premiere Pro Essential Sound panel again will override the previously generated key frames which is not the case with Sidechaine compression which works automatically and continuously in real-time once it’s added as an insert on the audio track.
What is Sidechain Compression ?
Sidechain compression is a technique commonly used in audio production and mixing to dynamically control the level of one audio signal (the “source” signal) based on the amplitude of another signal (the “trigger” signal). The primary purpose of Sidechain Compression is to create more space in the mix and allow certain elements to cut through without overpowering others.
Here’s a breakdown of how Sidechain Compression works and how to use it in mixing audio tracks:
Understanding Sidechain Compression:
- Source Signal:
- The audio signal you want to affect (e.g., a sound effect , synth , or background music) is the source signal.
- Trigger Signal:
- This is the signal used to control the compression like voiceover. It doesn’t affect the output directly but influences the compression settings.
- Compressor Settings:
- You apply a compressor to the source signal, and instead of triggering the compression based on its own amplitude, it reacts to the trigger signal.
- Threshold and Ratio:
- The compressor has a threshold setting that determines when compression starts and a ratio that determines how much compression is applied.
- Ducking Effect:
- When the trigger signal’s amplitude surpasses the set threshold, the compressor reduces the volume of the source signal, creating a “ducking” effect.
Sidechain compression is a powerful tool for creating a more dynamic and balanced mix, especially in genres like electronic music. Experimenting with different source and trigger combinations allows you to shape the overall sound and emphasize specific elements in your mix.
Using Sidechain Compression to mix voiceover and music
Using Sidechain Compression with voiceovers and music can be particularly effective in ensuring that the voice remains clear and prominent in the mix without competing with the musical elements. Here’s how you might apply sidechain compression in this context:
Scenario: Voiceover and Music
- Identify the Voiceover:
- Identify the voiceover track that you want to remain clear and intelligible throughout the mix.
- Insert a Compressor on the Music Track:
- Place a compressor on the music track that you want to duck in volume when the voiceover is present.
- Set Up the Sidechain:
- Most compressors have a sidechain input. Route the voiceover track to the sidechain input of the compressor on the music track. This means that the compressor will be triggered by the voiceover.
- Adjust Threshold and Ratio:
- Set the threshold so that the compressor is activated when the voiceover is present. Adjust the ratio to control how much the music is reduced in volume when the voiceover occurs.
- Fine-Tune Attack and Release:
- Adjust the attack and release settings to ensure a smooth and natural transition. A relatively fast attack can allow the voice to cut through quickly, while the release determines how quickly the music returns to its original volume after the voiceover ends.
- Balance the Mix:
- Play the mix and listen carefully. Tweak the settings until you find a balance where the voiceover remains clear, and the music dynamically adjusts to accommodate the voice.
By implementing sidechain compression in this way, you can enhance the clarity and impact of voiceovers in the context of a musical mix, ensuring that important information is communicated effectively without compromising the overall musical experience.
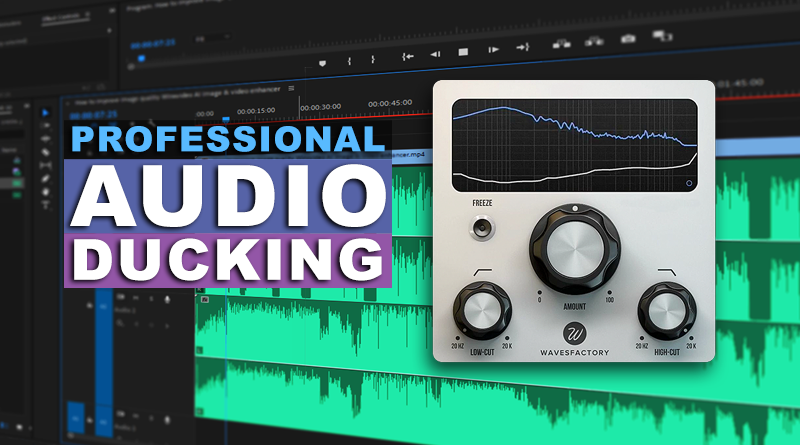
What is Wavesfactory's Trackspacer ?
Wavesfactory’s Trackspacer is a dynamic equalizer plugin designed for use in audio mixing and production.
Please watch the following video tutorial to get an idea on how Trackspacer can be used to Sidechaine Voiceover and background music in Premiere Pro.
Wavesfactory Trackspacer Features:
- Dynamic Equalization:
- Trackspacer is primarily used for dynamic equalization. Unlike a traditional static equalizer, it analyzes the sidechain signal (typically from another track) in real-time and applies EQ adjustments to the main track dynamically.
- Frequency-Selective Ducking:
- Trackspacer allows you to selectively attenuate specific frequencies in the main track based on the content of a sidechain signal. This is particularly useful for creating space in the mix and preventing frequency masking between different tracks.
- Sidechain Input:
- You can route any audio signal to Trackspacer’s sidechain input. This can include voiceover, or any other effect or element that you want to use as a reference for dynamic EQ adjustments on the target track.
- Adjustable Parameters:
- The plugin typically includes controls such as Threshold, Ratio, Attack, and Release, allowing you to fine-tune the dynamics and behavior of the equalization.
- Visual Feedback:
- Trackspacer often provides visual feedback, such as a spectrum analyzer or graphical representation of the dynamic EQ adjustments. This helps you see how the plugin is affecting the frequency content in real-time.
- Presets and Customization:
- The plugin may come with presets to help you get started quickly, but it also allows for extensive customization. You can tailor the EQ settings to fit the specific needs of your mix.
Installing & using VST plugins in Adobe Audition
Adobe Audition supports the use of VST (Virtual Studio Technology) plugins, which are third-party audio processing tools that can enhance and expand the capabilities of your digital audio workstation. Here’s a step-by-step guide on how to install and use VST plugins in Adobe Audition:
Installing VST Plugins in Adobe Audition:
- Locate VST Plugins:
- Download the VST plugins you want to use. Ensure they are compatible with your version of Adobe Audition and your operating system (Windows or macOS).
- Extract or install the Plugin Files (if necessary):
- If the plugin files are compressed (e.g., in a ZIP folder), extract them to a location on your computer.
- Choose Plugin Installation Folder:
- Decide on a location to install or store your VST plugins. Some users prefer to use the default VST plugin folder, while others may create a custom folder. Common default locations are:
- Windows: C:\Program Files\VSTPlugins
- macOS: /Library/Audio/Plug-Ins/VST
- Decide on a location to install or store your VST plugins. Some users prefer to use the default VST plugin folder, while others may create a custom folder. Common default locations are:
- Copy or Move Plugin Files:
- Copy or move the extracted plugin files (usually with a .dll extension on Windows or .vst on macOS) to the chosen plugin folder.
Adding VST Plugins to Adobe Audition:
- Open Adobe Audition:
- Launch Adobe Audition on your computer.
- Navigate to Preferences:
- On Windows, go to Edit > Preferences > Effects (or VST in older versions).
- On macOS, go to Adobe Audition > Preferences > Effects (or VST in older versions).
- Specify VST Plugin Folder:
- In the Preferences/Effects window, find the section related to VST plugins.
- Click on the “Add” or “Browse” button to specify the folder where your VST plugins are located.
- Select the folder where you installed your VST plugins and click “OK” or “Choose.”
- Scan for Plugins:
- Once you’ve added the folder, click on the “Scan for Plugins” or “Refresh” button. Adobe Audition will scan the specified folder for VST plugins.
Now you should be able to use your installed VST plugins within Adobe Audition to enhance your audio processing and mixing capabilities. Keep in mind that the specific steps might vary slightly depending on the version of Adobe Audition you are using.
Please make sure you follow our pages on pinterest and facebook as well subscribe to our youtube channel to get informed each time we post new articles and tutorials.
hdesigntutorials