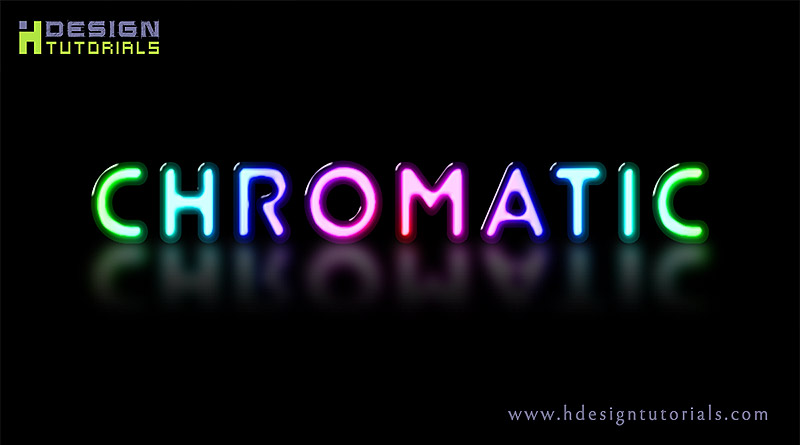
Chromatic text effect in photoshop
first of all you will need to install the font used in this tutorial junegull.ttf which is a rounded text type, Download the font from Here
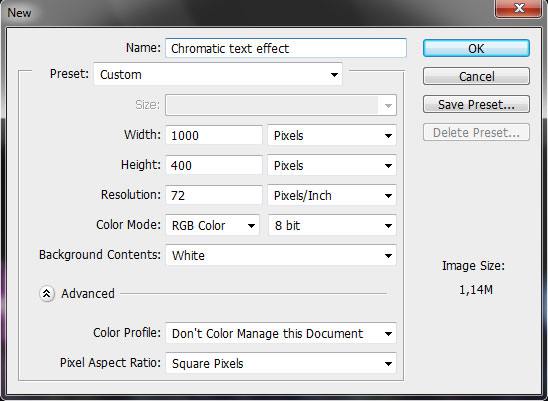
1- Run Photoshop and from File menu click on New to create a new document with the same size and settings shown in the image below.
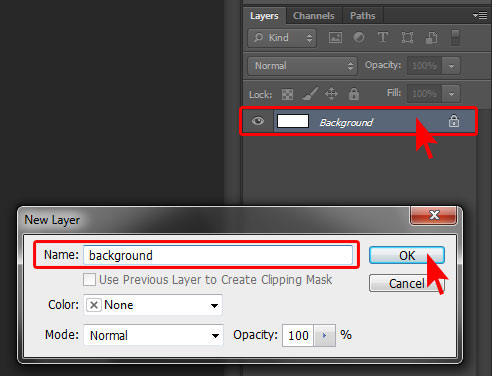
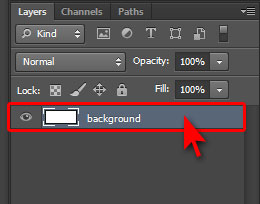
2- Double click on the Background layer to unlock it then in the New layer window rename your layer as Background and click on Ok
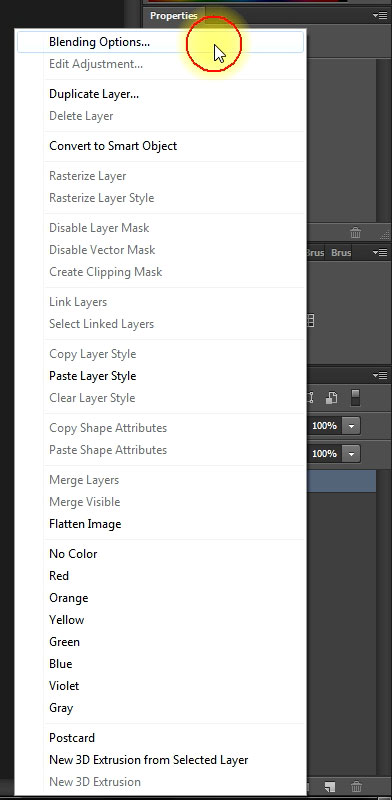
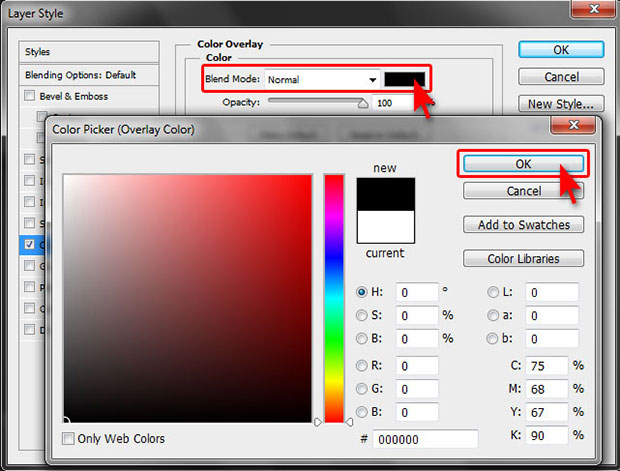
3- right click the background layer then choose Blending Options from the list
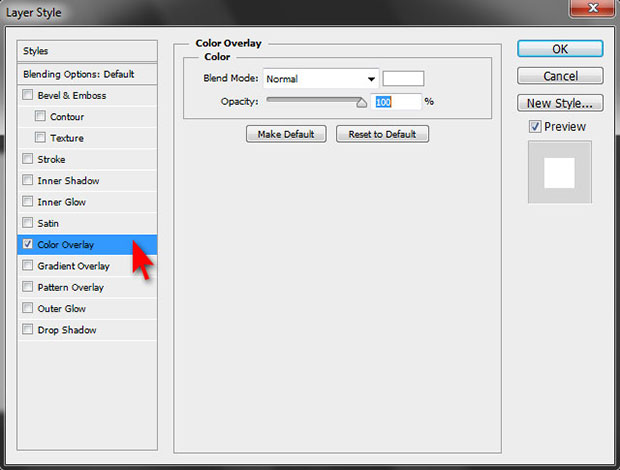
4- in the Blending options – Layer Style window click on Color Overlay
5- click the color swatch then in the Color Picker (color Overlay) window change the color to black then click ok on both windows to apply the changes
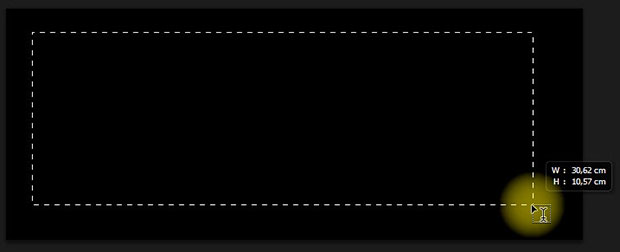
6- Select the text tool from the tools panel on the left or Tap ( T ) on the Keyboard to write the text

7- Click and drag a rectangular area inside your document Canvas to type the text
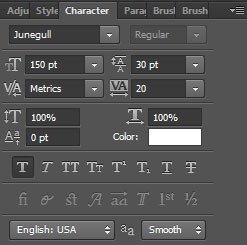
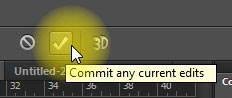
8- type the text then in the Character panel make sure to change the Font to Junegull and to set the size of your text to ” 150 pt ” see the image below
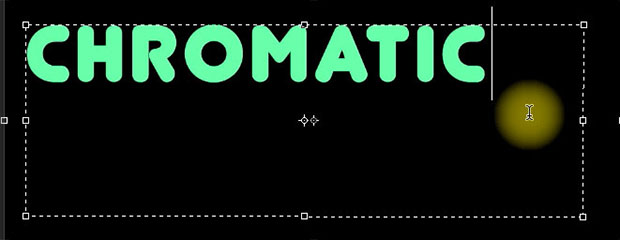
9- click on the check mark icon on the top left of the work space to validate the text or tap the Enter key in the numpad on your keyboard
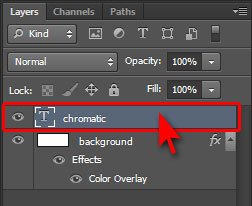
10- right click the text layer and choose Blending Options from the list
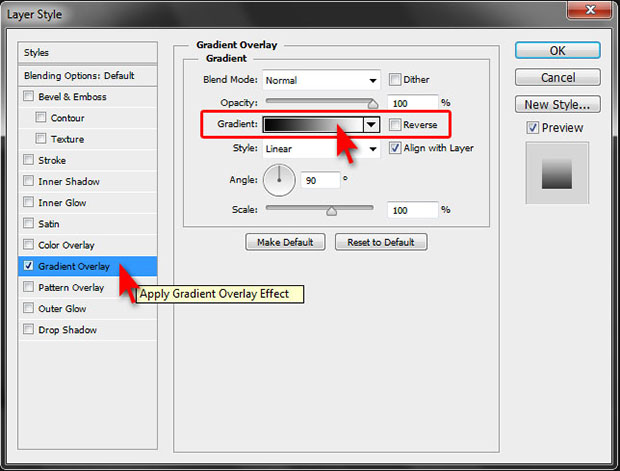
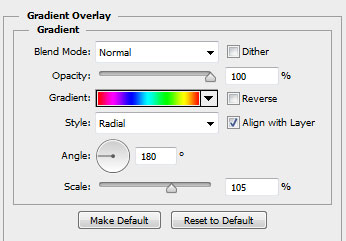
11- in the Layer Style window click on Gradient Overlay Tab on the left then click the gradient to edit it
12- in the Gradient Editor window choose the Spectrum gradient from the presets or you can download the gradient i created from Here chromatic gradient
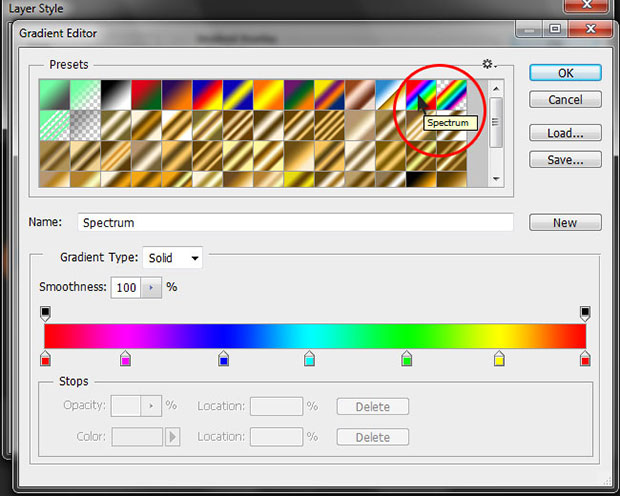
13- make sure to copy the same gradient settings from the image below then click Ok
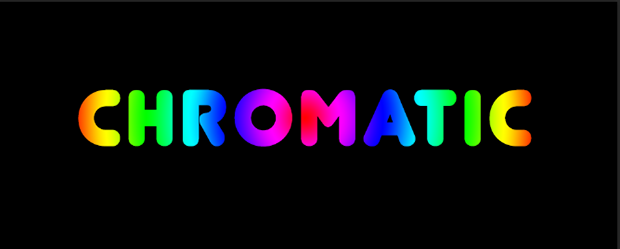
after applying the gradient your text should look like this
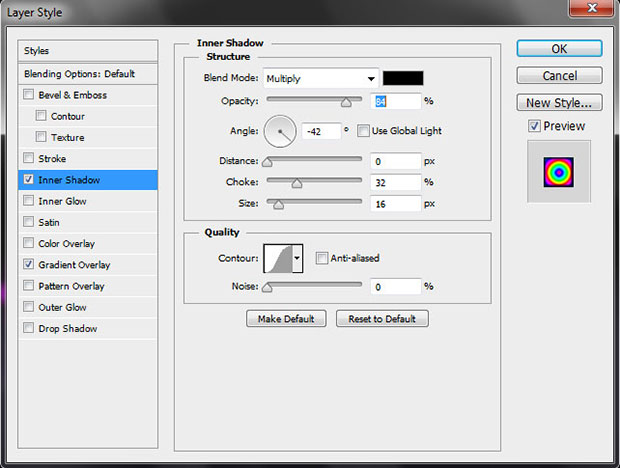
14- in the layer style add an inner shadow with the same settings shown in the image below copy the settings
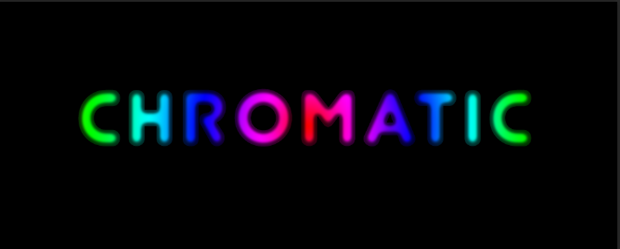
after adding the inner shadow the text will look like this
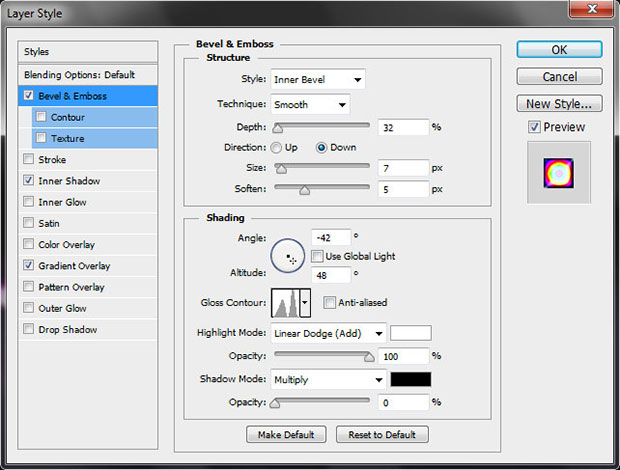
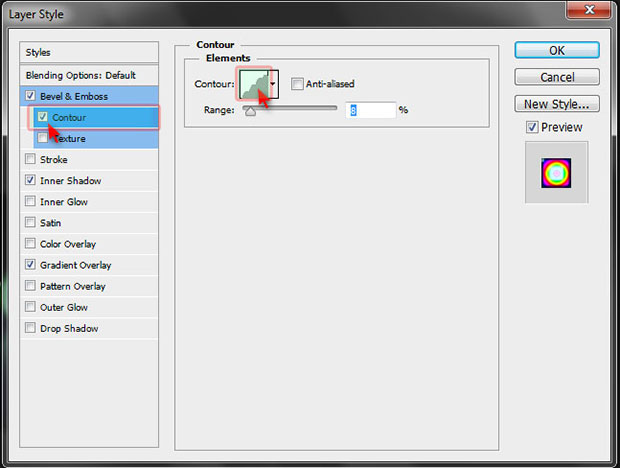
16- in the layer style Add Bevel & Emboss, copy the settings shown in the image below
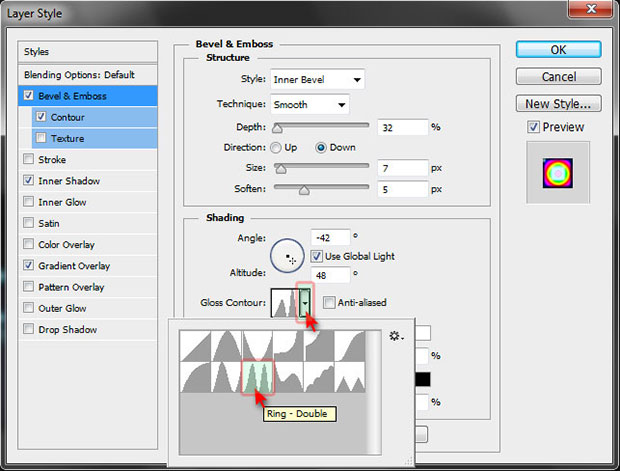
Note : in Gloss Contour i’ve selected ( Ring – Double ) make sure to select the same contour
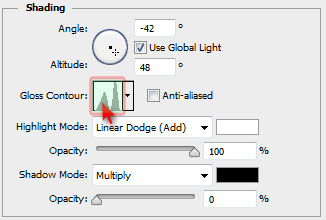
then click the Gloss Contour thumbnail to open the contour editor window
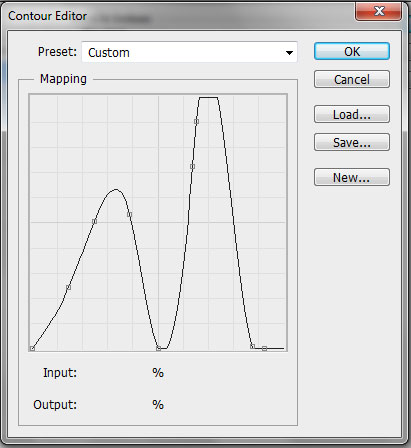
try to edit the graph as shown in the image below or, simply download the edited contour from Here then load it by clicking the Load… button to add it in your presets
17- Under Bevel & Emboss add Contour and make sure to select the ( Rounded Steps ) Contour preset then set the Range to 8
After editing the style, the text should look like this

Adding reflection
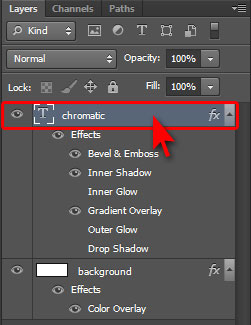
1- select the text layer then tap CTRL + J on your keyboard to duplicate the layer
2- place the duplicated text layer under the original one

3- select the duplicated text layer then from Edit menu choose Free Transform or tap CTRL + T

4- right click the duplicated text layer and choose Flip Vertical from the drop down menu


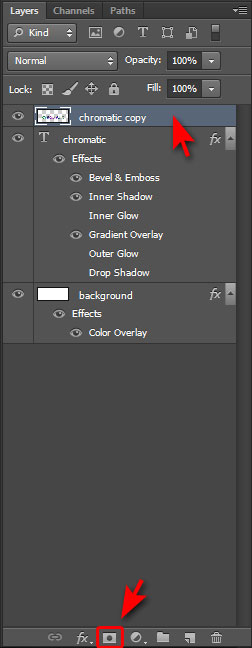
5- select the duplicated text layer then go to Layer menu —> Rasterize then choose Layer stylefrom the list to rasterize the style of the layer and convert it from text to pixels

6- in the Layers panel select the duplicated text layer then click the Add Layer Mask button located in the bottom of the layers panel
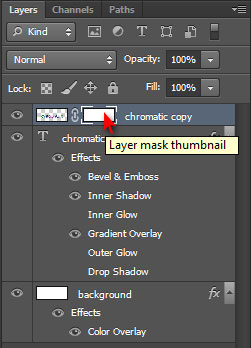
7- click the rectangular Layer Mask Thumbnail to select the Mask
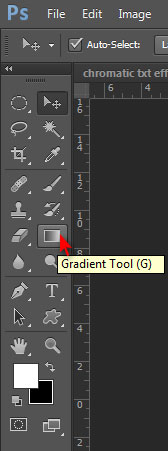
8- from tools select the Gradient Tool or tap ( G ) on your keyboard
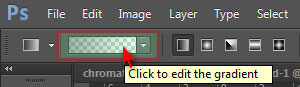
9- from under the top menu click the gradient to edit it
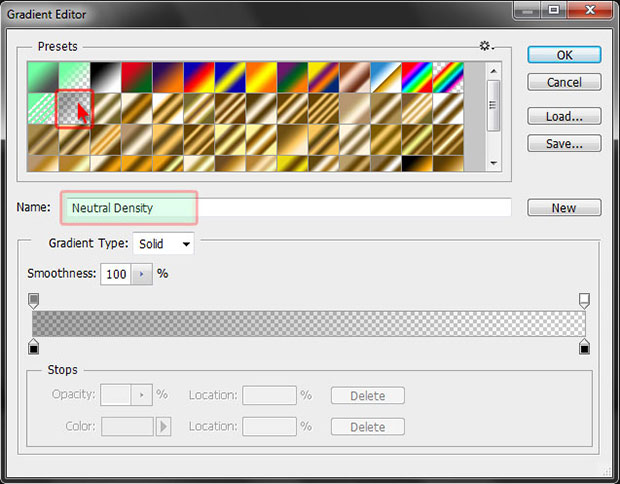
10- in the Gradient Editor window select the Neutral Density gradient preset
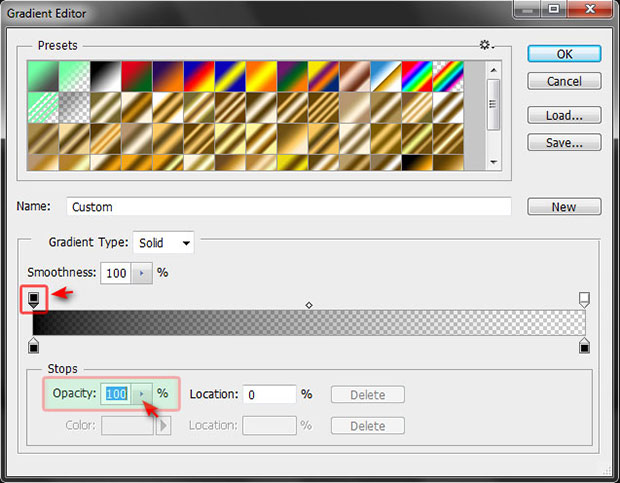
11- click the upper left color locator in the gradient bar then set the Opacity to 100
11- click and drag a line from the bottom to the top of the two text layers to apply the gradient on the duplicated layer
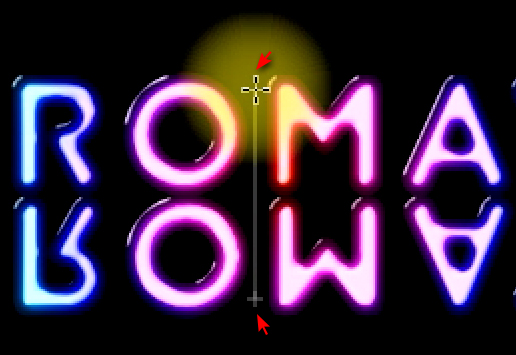
try to get a similar result to the image below
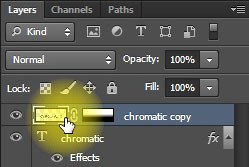
12- in the Layers panel click the rectangular Layer Thumbnail to select the layer
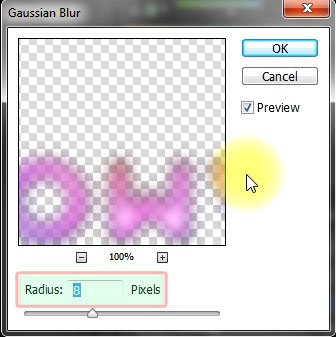
13- Go to filter Menu —> Blur —> Gaussian Blur
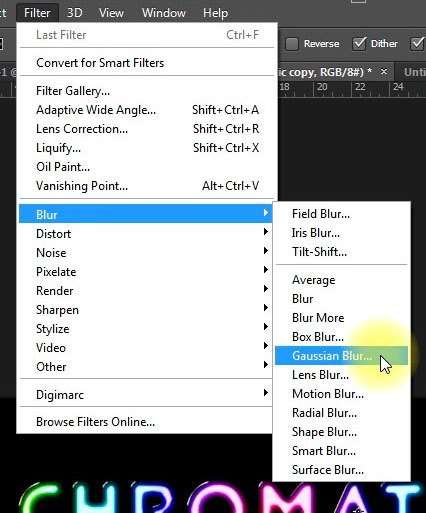
14- in Gaussian Blur window set the Radius: to 8 then click ok, this gonna blur the bottom reflected text layer
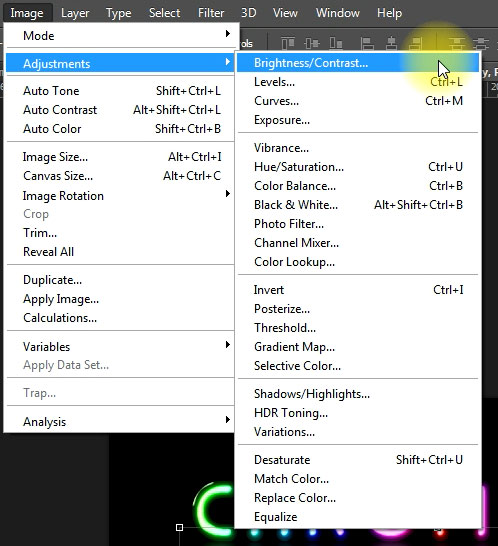
15- Go to Image menu —> Adjustments —> Brightness/Contrast…
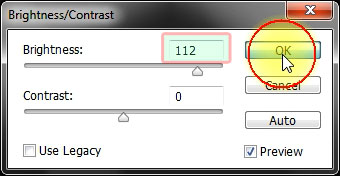
16- in the Brightness/Contrast… window set the Brightness: to 112 then click ok
as a final result you should get the same appearance of the image below
![]() Click on the image to see the full size
Click on the image to see the full size
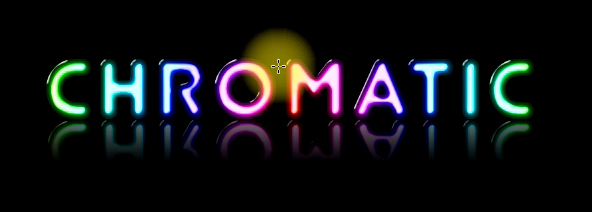
the final Chromatic text Effect
that’s it thank you for following this tutorial, i hope you learned something new
Download tutorial files here: chromatic text effect.psd & the Chromatic text style .asl