Video noise reduction in Photoshop cc 2017

Video noise reduction in Photoshop cc 2017

Video noise reduction in Photoshop cc 2017

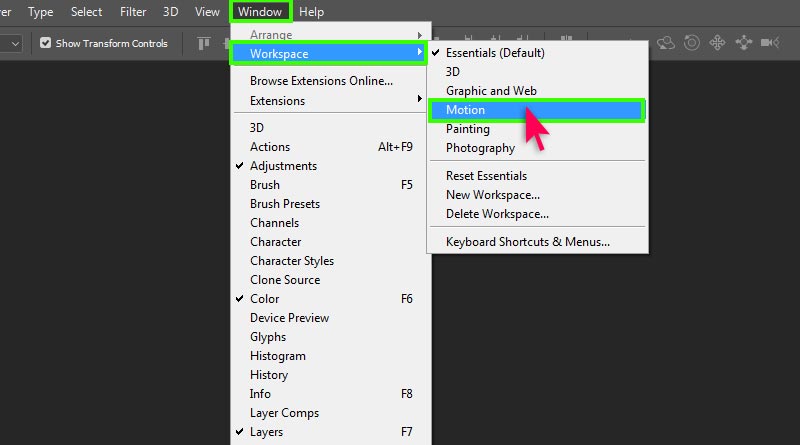
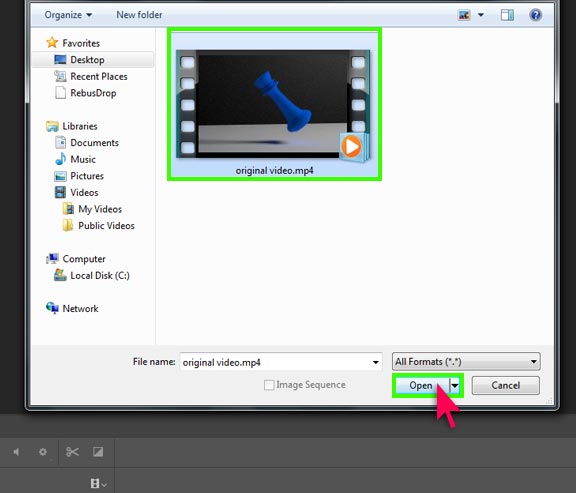
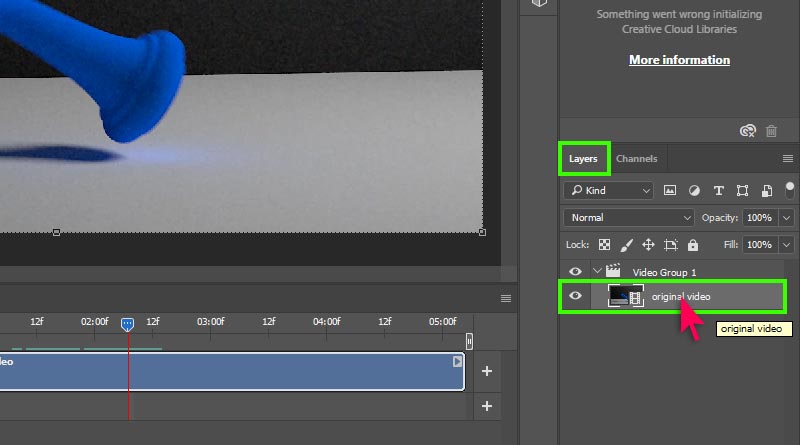
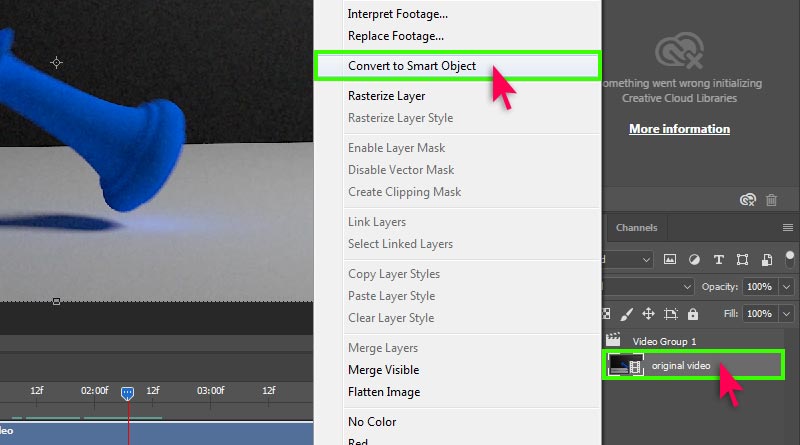
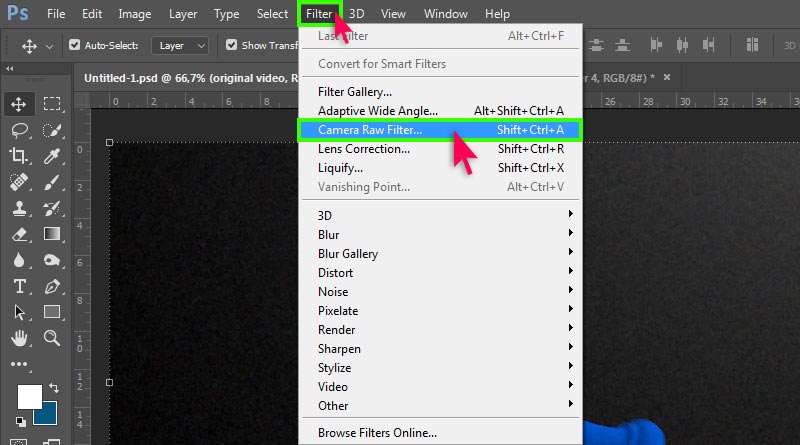
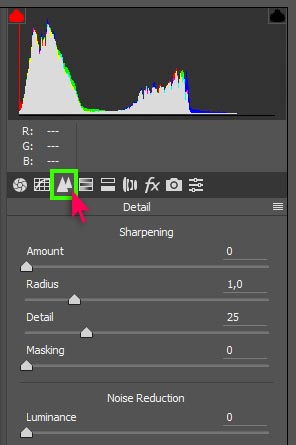
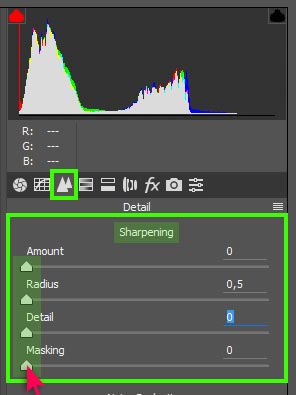
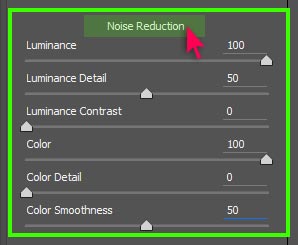
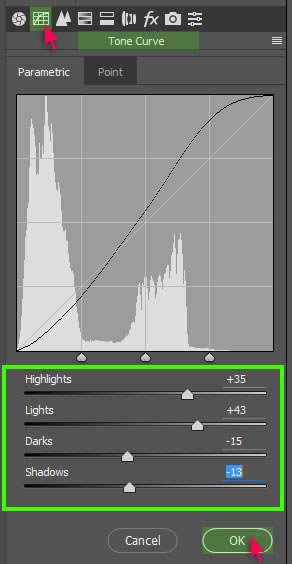
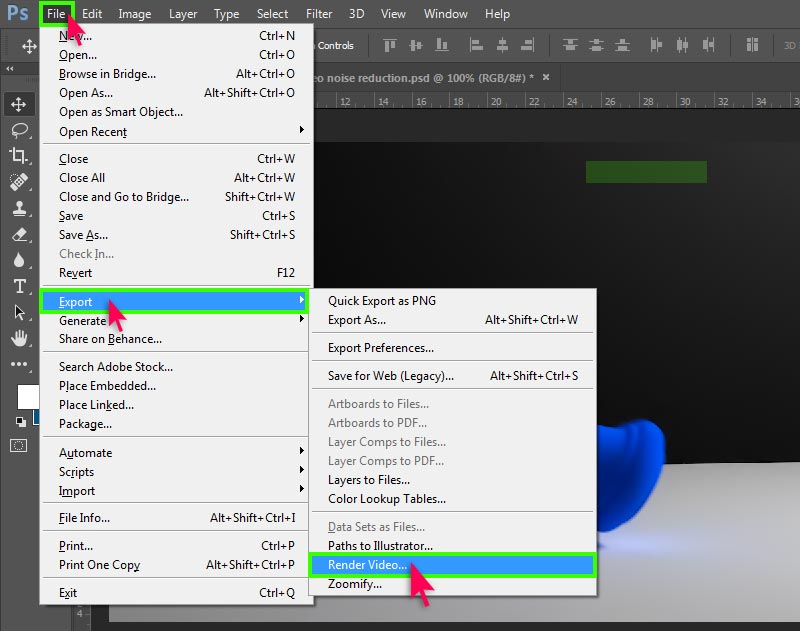
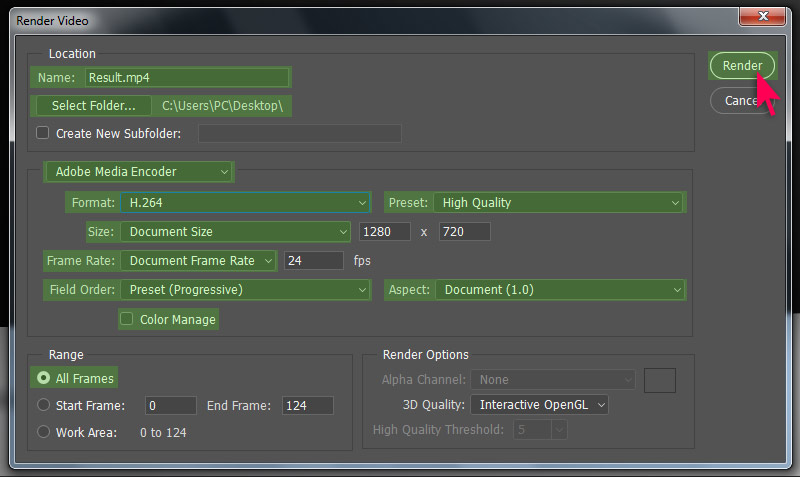
in this tutorial discover an easy way to remove noise from your videos in Adobe Photoshop CC 2017, using the Camera Raw Noise Reduction Filter to completely achieve high quality video noise removal and reduce grain and electronic generated noise or treat low light grainy footage in this detailed tutorial.

1- Run Adobe Photoshop and go to Window Menu — Workspace — and select Motion from the list.

2- in the Timeline widget that appears in the bottom , click the small film icon then choose Add Media..

3- Select the video then click on Open.

4- after importing the video , go to Layers panel on the right then right click the video.

5- from the menu chose Convert to Smart Object.

6- Now go to filter menu and select Camera Raw Filter..

7- in the Camera Raw Filter Window on the right, switch to the Detail tab.

8- Reduce the four ( “Amount” , “Radius” , “Detail” , “Masking”. ) Sharpening parameters to Zero.

9- under the Sharpening parameters, set the Noise Reduction parameters to the following values :

  • set Luminance to 100
  • set Luminance Detail to 50
  • set Luminance Contrast to 0
  • set Color to 100
  • set Color Detail to 0
  • set Color Smoothness to 50

10- now switch to the Tone Curve Tab and enter the following settings :

  • set Highlights to +35
  • set Lights to +43
  • set Darks to -15
  • set Shadows to -13

then click on Ok Button to apply all the filters.

11- After applying the Camera Raw Noise Reduction filter, go to File menu — Export then select Render Video

12- in the Render Video window do the Following :

  • Give your video file a name
  • Select a folder for the Export
  • make sure Adobe Media Encoder is selected
  • set the Format to : H.264
  • set the Preset to : High Quality
  • set Size to : Document Size
  • set Frame Rate to : Document Frame Rate
  • set Field Order to : Preset ( Progressive )
  • set Aspect to : Document ( 1.0 )
  • make sure Color Manage box is unchecked
  • set Range to : All Frames

you can also set the Format to “QuickTime”, and the Preset to “Uncompressed” to get the maximum render Quality possible.

then click on Render botton to render your video.

Also you can watch this fully detailed video tutorial to see the live comparison before and after applying the Camera Raw Noise Reduction filter.

Video noise reduction in Photoshop cc 2017

please make sure you follow our page on facebook and subscribe to our youtube channel to get informed each time we post new articles and tutorials.

Leave a Reply

Your email address will not be published.